|
|
Post by scorp11 on Sept 18, 2012 22:56:24 GMT -5
I am currently working on a custom Scorpion Whip project. I started a thread back on Vintage Sleds a long time ago, but now that I know how to post pics here, I have decided I should post the info here.
Most of this is duplicate from there, but since it is Scorpion, it should be here for the Scorpion folks to see.
|
|
|
|
Post by scorp11 on Sept 18, 2012 22:57:05 GMT -5
We have a couple Scorpion Whips we are going to build to ride this winter. Both will have Sachs engines, one a 340SS, one a SA 2 440. I got such positive feedback on documenting our Sting Restoration, I decided I should do the same for these.
This is for the Whip with the 440 Sachs. Photos will be coming soon, but first the plans.
The goodies that are on the docket for this sled are
NOS Scorpion Whip tunnel (no serial number so no year, but it is from 77-79)
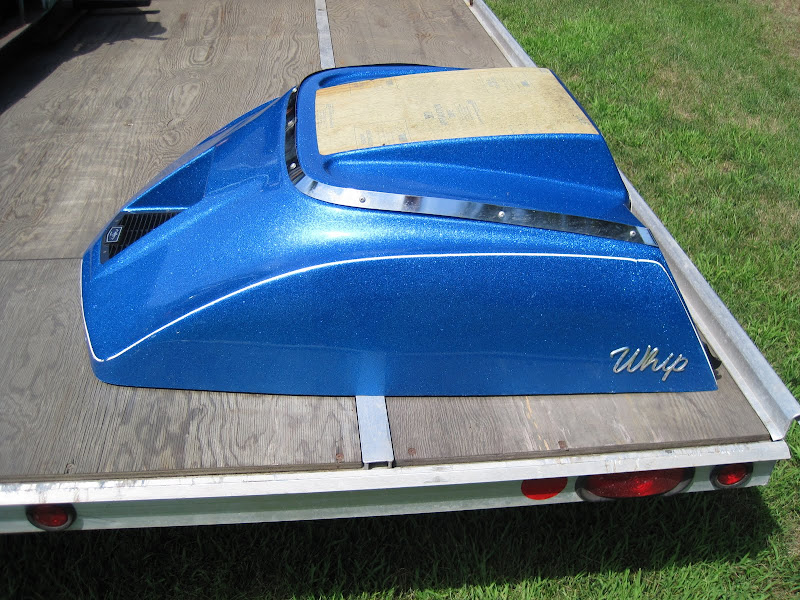
NOS 1975 Scorpion Whip hood (I love metal flake and this should look pretty sharp)
Very nice Chaparral track (I think it is 73 or 74)
Sachs 440 out of a 1971 Scorpion.
The "plan" is this.
I am going to fit the sled with a Paraslide II rear skid from a TK, possibly upgraded to a PS III and the Chaparral track. Rail spacing works out and I found a NOS Rupp driveshaft that is wide enough and I think I can make work. I still have to find the right gears, but it looks like with a few modifications, I can make it work.
Today I put the skid partially together and I think I found a way to make it work with the track. The biggest concern I have is that the track doesn't have any guide clips on it. I don't know how much the track will wander.
That is as far as I am right now. Will get some pictures posted as soon as I take some.
Any thoughts / ideas are appreciated.
|
|
|
|
Post by scorp11 on Sept 18, 2012 22:58:10 GMT -5
|
|
|
|
Post by scorp11 on Sept 18, 2012 22:58:56 GMT -5
As you can see from the previous post, I made some progress on what I was going to need to do with the suspension to make a Paraslide III work. For those who don't know, a Paraslide III was never available for this length track. It was only on the Stings. Fortunately, the only thing I want from the ParaSlide III is the extra set of Slide Saver wheels. That is a bolt on addition in this case. It will be a little different than the PS III in the Stings as they moved the front set of bogies back on those. They also added more arch to the front of the rail on the stings. Since I am not doing that, I don't want to just move the wheels back. I'll have to watch for any abnormal slide wear when I run it. I can always drill a new hole and move them back later or just remove the extra wheels.  The driveshaft is a work in progress. It is going to be close, but I think I might be able to make it work. I'll need to use a chain case out of a 75-76 whip since they took a bigger OD bearing. The driveshaft is 1 1/4" since it is made out of aluminum. They machined it down on the left side where the gear goes on and on the right side. I may have to build the right side to give the bearing enough surface. Not sure how I will do that yet, I may just JB Weld it, then file that down.   I still need a 1 inch by 15 tooth lower sprocket. If anyone has one, let me know. The best would be a 38 tooth, but if not, I'll work with what I can find. |
|
|
|
Post by scorp11 on Sept 18, 2012 23:00:06 GMT -5
|
|
|
|
Post by scorp11 on Sept 18, 2012 23:01:19 GMT -5
Did some experimenting with the drive shaft after getting the bearings that I needed. I "think" it will work, I may only have 1/16 inches or less between the cover and the bolt holds the lower gear on. Should work ok though. I am going to have to do something with the right side of the drive shaft as there is very little bearing on the shaft. The step that is machined in it takes up the most of it. I was just going to build up the shaft with some JB Weld, but it makes a lot more sense to have it turned down to 1 1/8. I just have to find a shop that will do it reasonably. If I am doing that, it would make sense to fill the end that was "gun drilled" with some JB Weld and have it drilled so I can put a speedometer insert in it.  |
|
|
|
Post by scorp11 on Sept 18, 2012 23:02:16 GMT -5
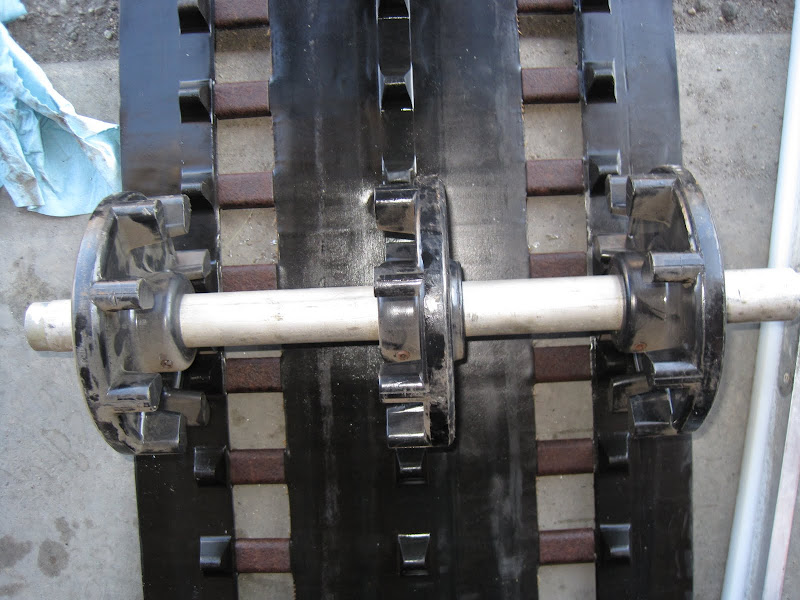
Got the track and suspension in yesterday. It seem so to fit pretty good. Just have to drill the holes for the upper cross shaft as they are not drilled. I'll have to measure a TK to see where it belongs. Both fit like they belong in there. Just have to decide if I am going to add guides to it. If I do, I will only add every third one as there would be 5 in contact with the slides at all times. I'd have to buy the tool to do it as well as the clips.   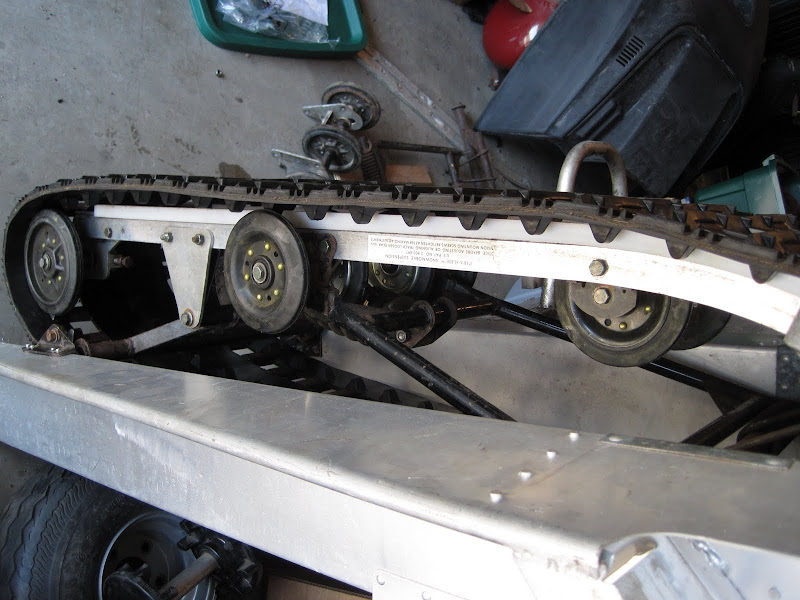 The Drivers for the Chaparral track are a little bigger than the Scorpion ones. To get some of the track length back, I am thinking of putting some Rupp Idler wheels up top that are roughly 1/2" smaller outside diameter. That won't do a lot, but should give a little back. At higher speed, they may be a little less efficient because of a higher bearing speed.  I have some rear Rupp Idlers that are 3/8" smaller OD as well, but to use them I'd have to modify things in the back a little. Not sure if I will use those or not. They have bigger bearings, so the bearing speed won't be affected much by the smaller OD.  |
|
|
|
Post by scorp11 on Sept 18, 2012 23:03:24 GMT -5
Finally made it back to this project. The rear skid is all done and together and ready to go in. I'll post pics tomorrow. I found sprockets and the right length chain. Had to resort to a silent chain setup. I plugged the end of the drive shaft with some aluminum "epoxy" stuff and installed a drive for the speedo. Considering I did it in the tunnel, it came out nicely centered.  Put the drivers in  When I put the gear and chain in, I ran into a problem. They didn't cut the splines on the shaft very far. Photo doesn't show it well, but there is just over 1/2 inch of useable spline.  With the gear and chain installed, the cover hits the chain. So, now I have to pull the driveshaft and see what it will cost to have the splines cut further so the gear will go on a bit further. If it is a lot, I am going to have to see if I can cut my own. . . Not sure how yet. I bought a used track just like the really nice one I have for $10 at a swap meet. It is in good shape, but for $10, I am willing to run it without guides and see if I have issues. This was after I cut one guide off the other track and decided I didn't it very much. |
|
|
|
Post by scorp11 on Sept 18, 2012 23:04:04 GMT -5
Well, having the machine shop cut the splines another 1/4 inch was going to cost me $80. So, I instead went and bought a Dremel and did it by hand. Not the most fun task I have ever undertaken, but all in all not to bad. I do know I am glad I didn't choose dentistry as my profession Before   After   Next the chaincase, drive shaft, track and maybe the rear skid go in. Hopefully tomorrow |
|
|
|
Post by scorp11 on Sept 18, 2012 23:05:03 GMT -5
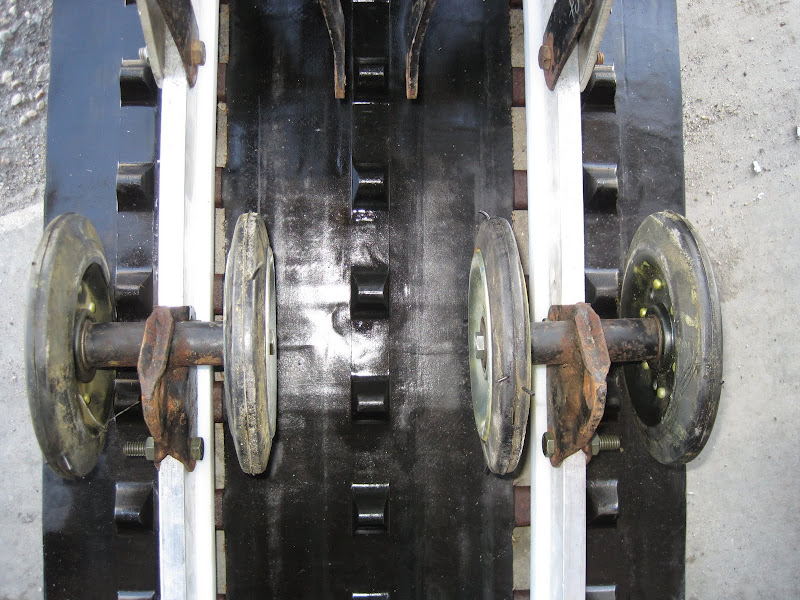
Have made a little more progress with this project. Have also had some changes in plans. First for the progress. Rear Skid is painted, together and installed. I may yet end up chainging the rear torque arm and mount to raise the back of the sled up a little, but for now it is in. Couple of items of note. I couldn't find the right slides for this. I have a ton of NOS slides for the Stings that use this rear skid, but the TK's take one that is about an 1 1/4 " longer. I decided to work with what I had. I took a "sting" slide and slid it back the right amount. Then drilled the slide and rail and installed a roll pin in case the thin area got worn through. Then re-drilled and tapped the mount on the top and installed the bolt. 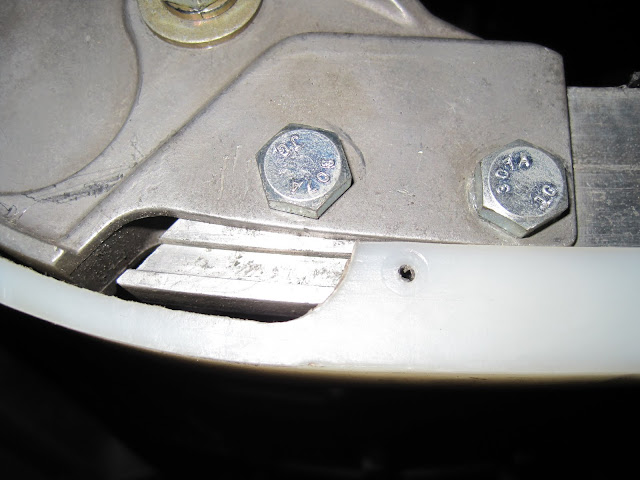  Installed the skid. Had to do some spacing of the different wheels, but everything fits pretty well. I just have to drill the hole for the cross shaft that supports the track and all should be good. 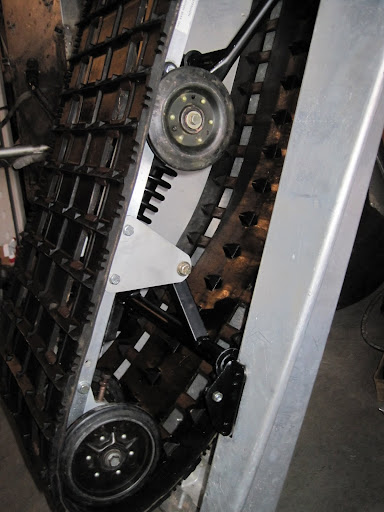 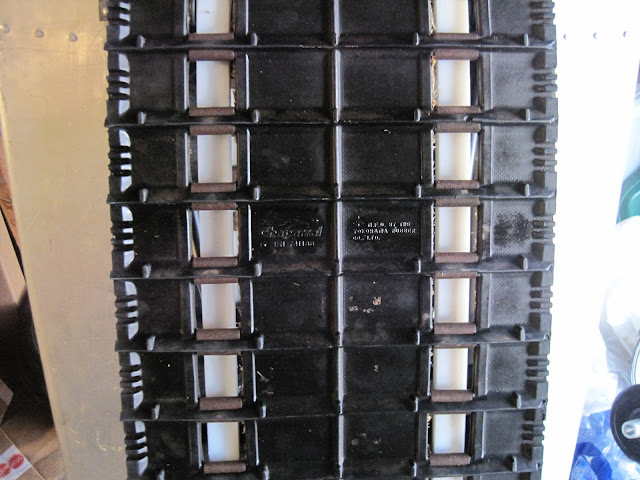 |
|
|
|
Post by scorp11 on Sept 18, 2012 23:05:47 GMT -5
Now for the changes. Due to issues I haven't resolved with how to mount the exhaust for the Sachs, I am thinking of putting a 440 Cuyuna in this initially. The twist is I want to install a dual carb setup on it. I was thinking of dual 38 mikuni's. It originally had a single 36mm powerjet carb on it. In talking with a friend who did this, he seemed to think dual 34's would be a better choice.
Anyone have any thoughts on size and where to start with needle, needle jet, main jet, pilot jet, etc ?? One plus is that I can fatten up the PTO side individually to try and help it cool a little better.
|
|
|
|
Post by scorp11 on Sept 18, 2012 23:07:00 GMT -5
OK, finally have returned to this project. There will only be one whip as the other tunnel just wasn't good enough to use. The 340SS will have to go in something else. I made a mod to the suspension so I could put the correct rear torque arm in the sled without hitting the center row of drive lugs on the track. We learned on Dad's TK that the 80 Sting arm can't be used on a Paraslide II as is. So, this mod raises the rear of the skid a little. Doesn't really add travel, as I added pieces to the arm for the bump stops. We replace the triangular shaped arms with some longer stronger ones. Also the steel straps.  Then add some tabs to the arm that will hit the bump stops with the same effective travel. 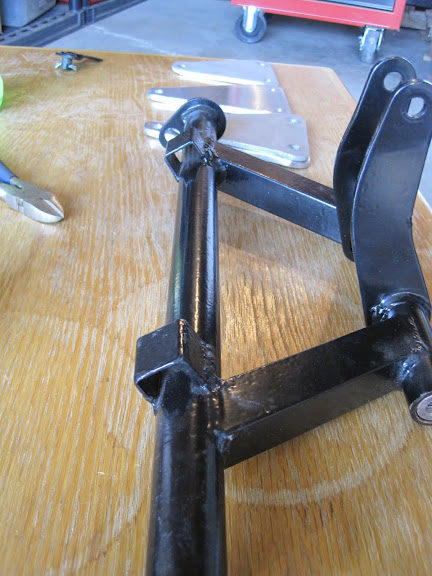 Installed  Suspension is all in, now working on the front end. I am using a used bumper that we cleaned up a long time ago, and the best 79-80 belly pan we have left. This one specifically was off a 79 Sting, but will work fine on this whip tunnel. It was really in pretty good shape, only one major crack along the bulkhead (very common). The steering stop didn't get set right at one point and I needed to fix that as well. a little plastic welding done on the bottom. 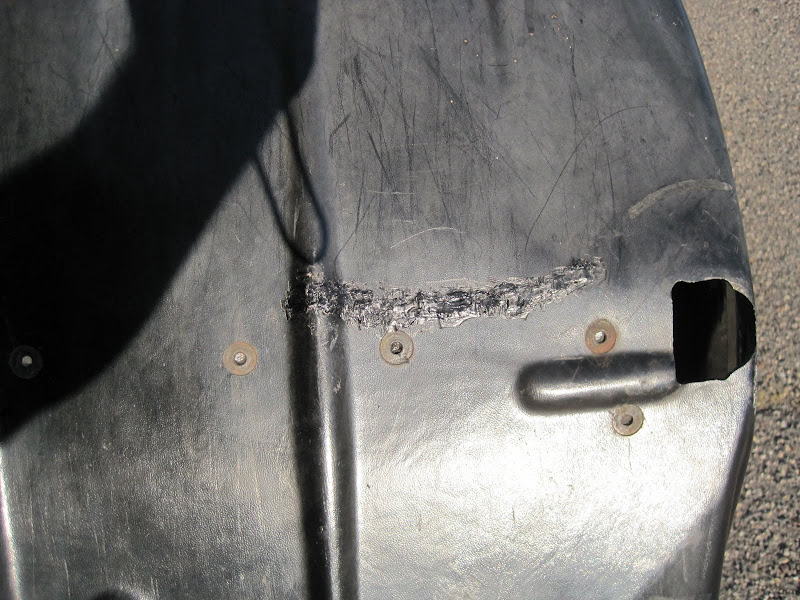 These sleds like to break the belly pan right along the bulkhead. I have a bunch of old chaparral fiberglass repair patches around, so I decided to use them to re-enforce that section before I riveted it on. I don't know if this will help or not, but can't hurt. 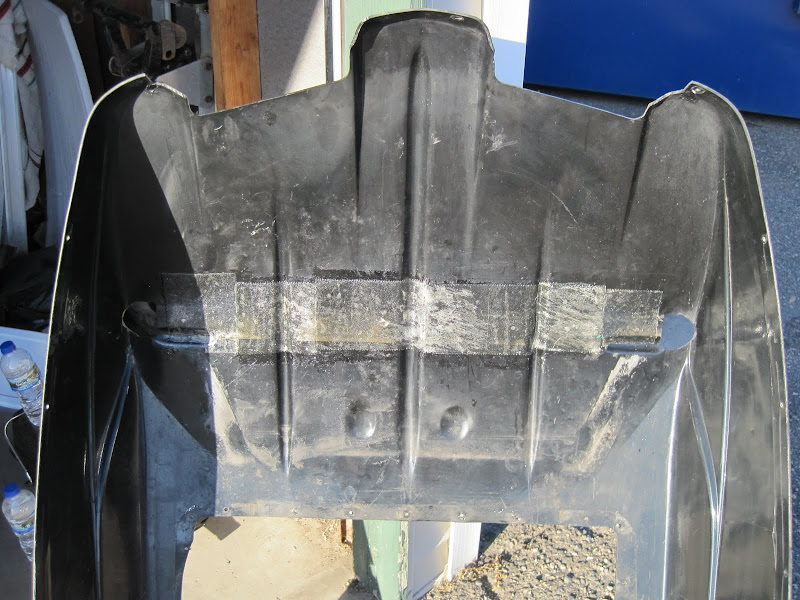 The pan was pretty oxidized. I spent a lot of time rubbing this out with rubbing compound. You can see here some progress. 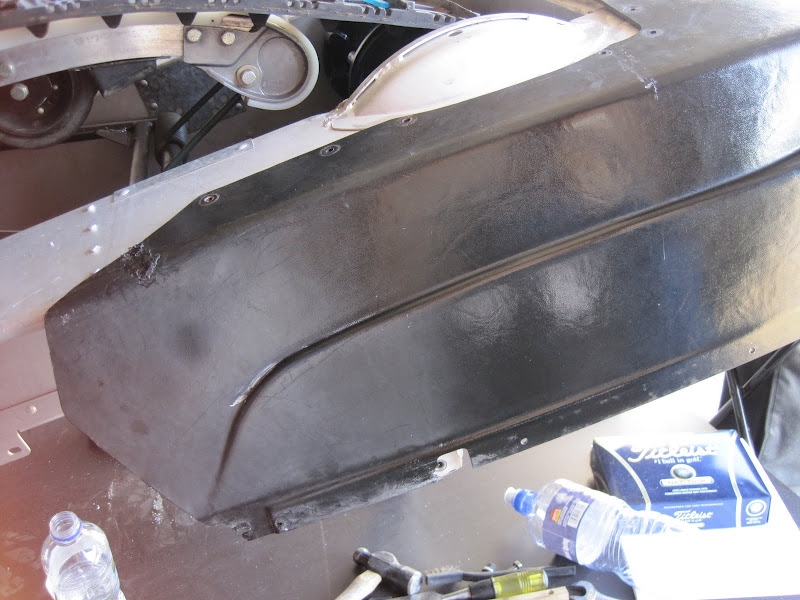 This won't turn out perfect, but its a rider. Best step I found was to use a scotch brite pad, heavy duty rubbing compound thinned with water. that got rid of a lot, then stepped down to 3m fine rubbing compound and some polish. Since its textured, I couldn't just wet sand it. |
|
|
|
Post by scorp11 on Sept 18, 2012 23:08:07 GMT -5
Got the bumper riveted on the pan, and the pan on the tunnel. Since this was a NOS tunnel, none of the rivet holes were drilled. It took some time to get things together so they seemed to fit right. Then I had to drill all the holes and rivet it on. 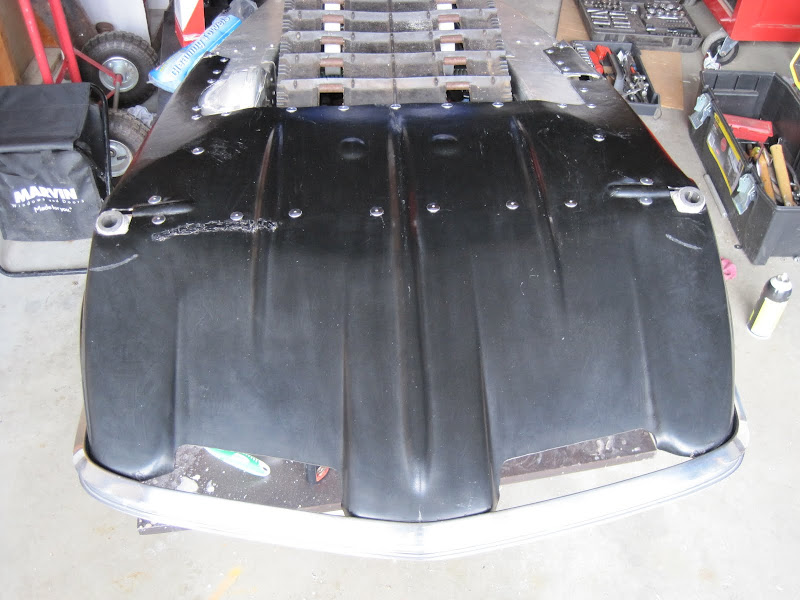  Finally flipped the sled back over, where hopefully it remains  |
|
|
|
Post by scorp11 on Sept 18, 2012 23:08:24 GMT -5
I picked this up at Princeton for $25. It's off a 2001 SRX The Scorpion Whip tunnels are pretty wide, they use the same tunnel for both 15 and 16 inch track. This Yamaha seat is the only one I found that is wide enough to fit. I thought the color would match the hood pretty good.  I need to recover the knee pads as you can see. The rear portion will probably get changed as well as I can't have the thing saying YAMAHA in big letters ;D It is a little short for the tunnel, and I have to have it all the way back for leg room. So, I'll have to modify the front of the cover to reach the tank cover. One change I had to make to the tunnel was to grind the bump that is in place for the shock on the pararail off and replace it with some old aluminum from our race car.   |
|
|
|
Post by scorp11 on Sept 18, 2012 23:09:21 GMT -5
Here you can see where we are headed. I set the hood down and kind of arranged things to get a feel for what things are going to look like. 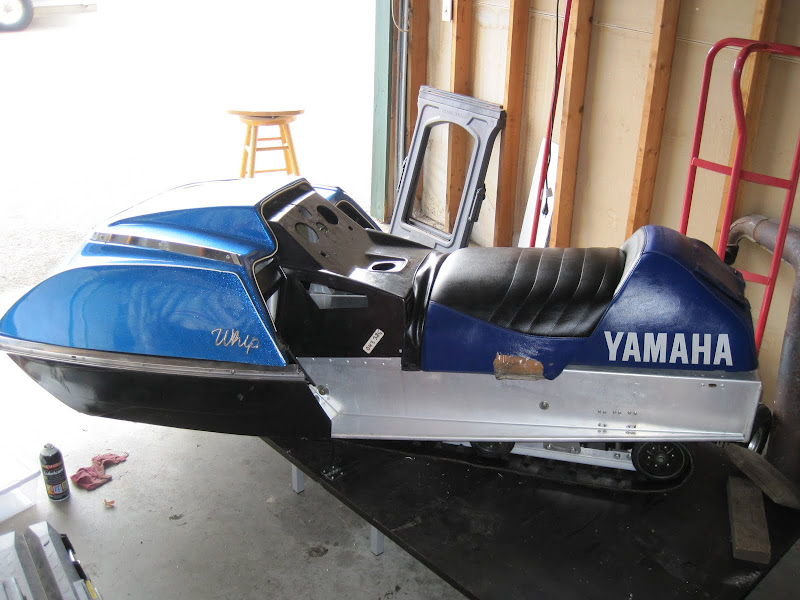  It is a good thing I did this before having the seat cover changed. Yamaha blue is a bit too dark for the hood. I'll have to have the sides done a little bit lighter to match the hood better I think. Also, turns out, there are different hood guides for fiberglass versus plastic hoods for a reason. I riveted the ones on for the whips with the plastic hoods. They are longer and that I knew. I did not know that the gap in them is thinner since the plastic hood is thinner than the fiberglass variants. Back in 1975 (which this hood is from) they actually had aluminum guides. I had some NOS ones around for a 1980 Sting, so I drilled out all the rivets, drilled the rivet holes in the new guides and riveted them on. Now the hood sets down in place. |
|
|
|
Post by scorp11 on Sept 18, 2012 23:09:41 GMT -5
One thing I did with the bumper was to rivet the it on with the rivets in the opposite direction from normal. That made things significantly harder because the rivet gun won't fit in the trim channel, so you have to shim it to get it to work. Plus I had to use backup washers on the back side since it was going against plastic. Plus, as with everything on a custom, you have to do it more than once ;D  Now, why did I go through all that work ? Well, I plan to fill the trim channel with some LED lighting. The sides will be Blue and I think I'll wire them to a separate battery. I think the LEDs will run off a 9 volt battery. That way I can have them on during the day if the sled is just parked without the engine running  The front set I am thinking of making bright white for the front wired to the dimmer switch. The headlight is right there, so that shouldn't be too hard and if I wire them to come on when the headlight is on bright, it should really light things up at night. Not sure I we will ride at night, but it sounds cool to do. The seat is a little narrower than the tunnel in the rear behind the knee pads as well. I think I might put a strip of LED rope lighting on each side there too. I have to figure out an option for a rear brake / tail light too. The seat didn't have one and I haven't found one that is cheap enough yet ;D Might try to make a LED one work there too, but haven't decided on that yet. Ideas ? |
|
|
|
Post by admin on Sept 19, 2012 17:50:26 GMT -5
That is some serious skill and determination right there!
|
|
|
|
Post by scorp11 on Sept 25, 2012 0:25:37 GMT -5
A slight problem has been encountered in trying to get the steering installed. The way it mounts on the scorpion is on a cross support on the bottom and through the top hoop the dash mounts on.  The distance between the two is too long for the bars. I spent a lot of time messing with this the last two days and finally decided the top hoop didn't get pulled down tight against the tunnel before they rivetted it in place. To "fix" it I would have to take the whole hoop apart and re-rivet it. . Since these are riveted to the footwells and the tunnel with solid aluminum rivets, I really didn't want to do that as they are a lot more solid than pop type rivets. So, I slotted the top and bottom mounts enough to get the bars to fit. That moves them up about 1/8 to 1/4 higher on the bottom. I'll find out this weekend if that will cause any steering clearance issues. The steering is a little snug now with NOS bars. So, I am going to use the best used set I have as they are a little bit looser. They are still very nice bars, but the have been worn in a little, so they turn free Hopefully it works cause I am really tired of this stupid steering holding me up. They have to go in before the motor can go in so they are holding up progress !!!! More pics for Indy once I get this infernal steering in place and make more progress ;D I did get the secondary clutch assembled and ready to go in. I just have to install the chaincase o-ring and put it in. |
|
|
|
Post by scorp11 on Sept 25, 2012 0:26:30 GMT -5
Made some progress on this sled, so here is where things are today. The sled will have offset spindles on it. For those who don't know, scorpion made these for various sleds. They make the ski stance 1 1/2 inches wider total. But, you need to replace everything seen in the picture. They use different steering arms, ski post bushings, spacers and spindles. It isn't just a matter of replacing the spindles. I have a used set of spindles and the rest of the parts are NOS.  Got the steering in place with the spindles and nothing hit anything so that is good. You can see the secondary has also been installed.  I set the motor in place. This motor has been together for a while. I have done a few things to it to try and reduce some of the heat that the poor PTO side sees on these motors.   I have taken to writing directly on the motor what I did to it. As you can see I added some clearance and widened the ring end gap on the PTO side. Also added a little end gap to the Mag side just to be safe. Stock clearances come out at around .005 for Cyl and .012 for ring end gap. These things run good, but run hot, especially on the PTO side. I'll find out this winter how this works as it is the first one I've done this to. This is pretty much a brand new motor right now. NOS Cyls, stator, new pistons, etc. . . should be a good piece. I am ok if the PTO side rattles a little, as long as it doesn't do this vintagesleds.com/bs/index.php/topic,55436.0.html, which it did the first time. |
|
|
|
Post by obj1 on Sept 25, 2012 20:13:16 GMT -5
Get that engine over to us and we'll test it for you at the Wausau race. Heat, semi and final back to back to back. If it makes that, then its a good piece!  |
|