|
|
Post by scorp11 on Sept 25, 2012 21:03:04 GMT -5
Get that engine over to us and we'll test it for you at the Wausau race. Heat, semi and final back to back to back. If it makes that, then its a good piece!  LOL. Probably true, but I'm afraid if it did well, I'd never see it again ;D |
|
|
|
Post by scorp11 on Oct 18, 2012 21:29:28 GMT -5
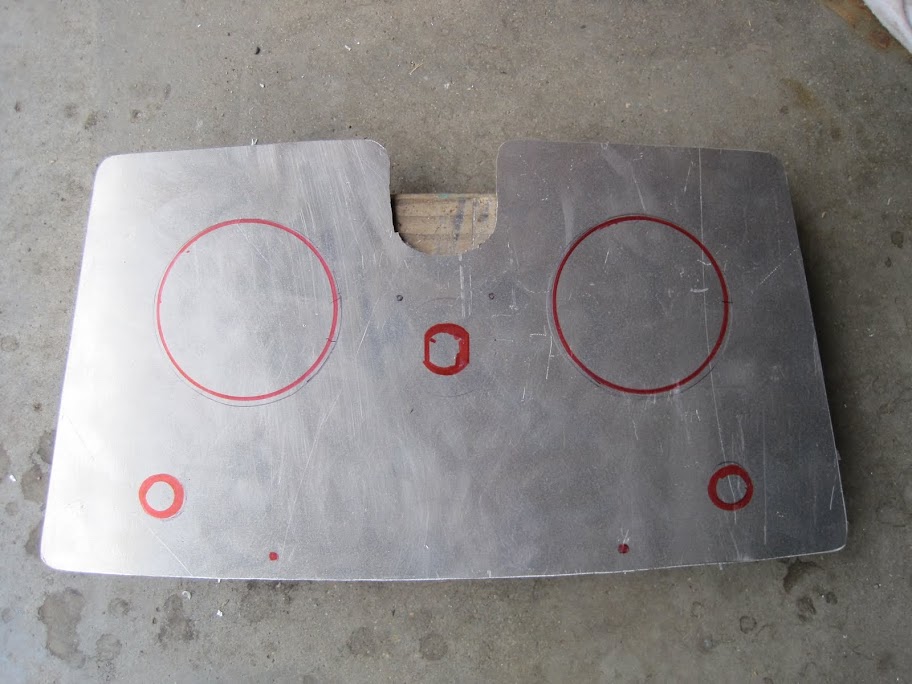
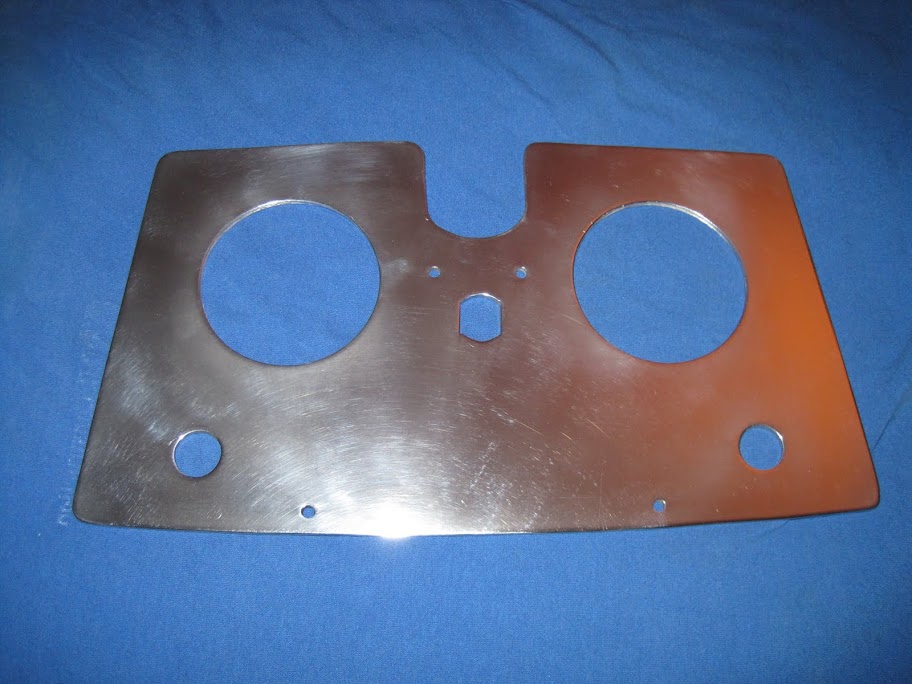
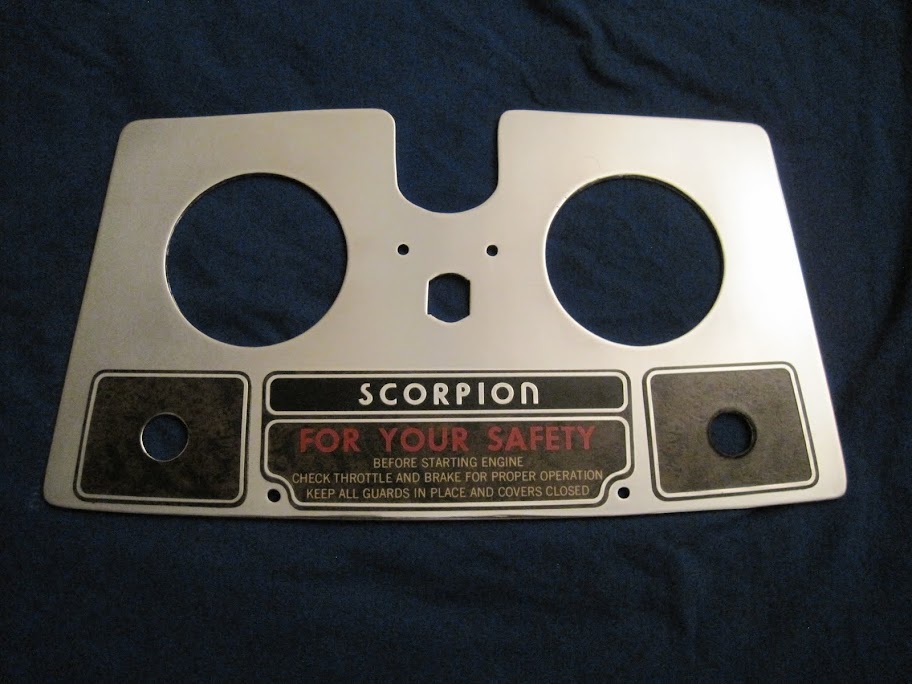
Getting to the point where I am going to start on the wiring and cosmetic stuff. I haven't decided yet what I am going to do for gauges. I have an NOS dash panel with correct NOS 1975 Scorpion Whip gauges. It would look cool, but its the only dash panel and tach like this I have. I might be better served to save this for someone doing a nice complete resto on a 1975 Whip so they could have a complete NOS matched set. I'm also kicking around the idea of having decals for the woodgrain inserts reproduced and having this NOS dash allows me to do that. 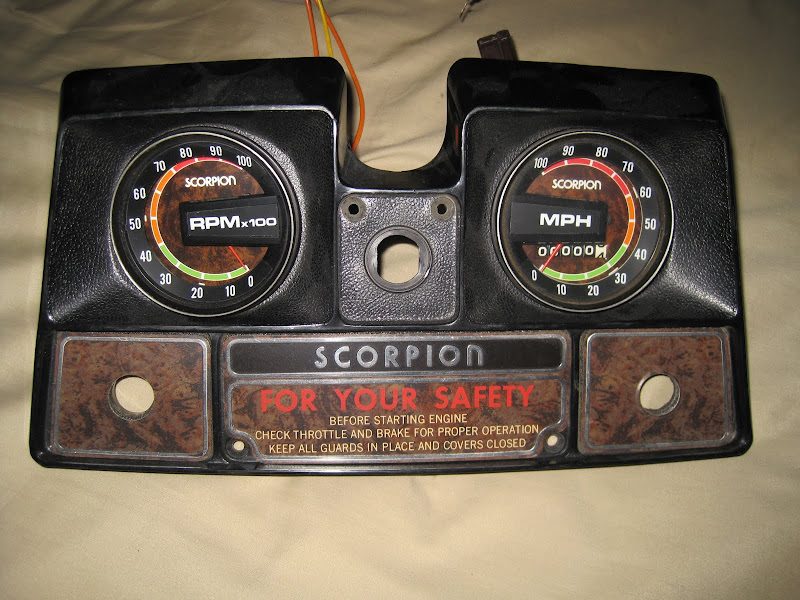 I also have a NOS set of 1979 and up gauges I could use. If I used them, I'd use them without the dash panel and maybe put some polished aluminum behind them or something. I have some speedo's for these, but again not many tachs.  Finally, I have a pair of Rupp gauges. These are in effect the same gauges as the previous ones, but with different faces. I think Scorpion started using them in 1979 when Rupp was no longer around to use the Nippon Seiki gauges. I've tested them and they work, just need to modify the connection.  I am leaning towards using the Rupp gauges as I have plenty of both of those. Plus, this sled is quite a mismatch of parts anyway, so why not ? I'll ask for thoughts, but I pretty much know the answer based on what would be the "coolest". I think some polished aluminum plate or something behind the gauges (instead of the plastic dash plate) might look cool. |
|
|
|
Post by scorp11 on Oct 18, 2012 21:30:19 GMT -5
Finally got to work on this sled again today. Got the gas tank and dash installed. I used the least nice NOS dash I had left as I really didn't feel like fixing a used one up right now. I needed this in place to accurately determine what changes I needed to make to the seat before I have it recovered. I stuck the NOS Rupp gauges in place just to see what they looked like. I am pretty sure I'll modify the wiring and use them.   I have to find some wire mesh type stuff to replace the stock plastic vents in the dash. Couldn't find what I need at Mills Fleet or Menards. I will have to do some more searching.  One day next week I plan to go to a metal shop and get a piece of aluminum cut that I can bolt onto the dash in place of the dash plate. Not sure if I'll leave it rectangular or more of an upside down T shape and leave the gauges out of it.  As you can see the seat comes out a little short. I am going to have the guy who does the seat add an extra 2 inches to the flap on the end to cover the dash / tank. I'll also see if he has some scrap foam I can use to fill in where the tank originally went on this seat.  I have to make some straps and rivet them to the tunnel to hold the front of the seat down to the tunnel yet. Might just get some flat stock aluminum and see if I can bend it up the right shape and size. Most of the underhood stuff I can do right now is in place. Put the recoil, fan pulleys and set the fan belt tension.  I also have to decide on grips. Below are the options I have. The middle is closest to original. I think the blue metal flake ones would look the best, but are a little larger grip. I think the top black ones would be the most comfortable. They are very nice and soft. I have to trim the flanges off in either case.  Thoughts  ? |
|
|
|
Post by scorp11 on Oct 18, 2012 21:31:09 GMT -5
|
|
|
|
Post by admin on Oct 19, 2012 20:53:40 GMT -5
She's a Beauty!
|
|
|
|
Post by scorp11 on Oct 19, 2012 21:09:01 GMT -5
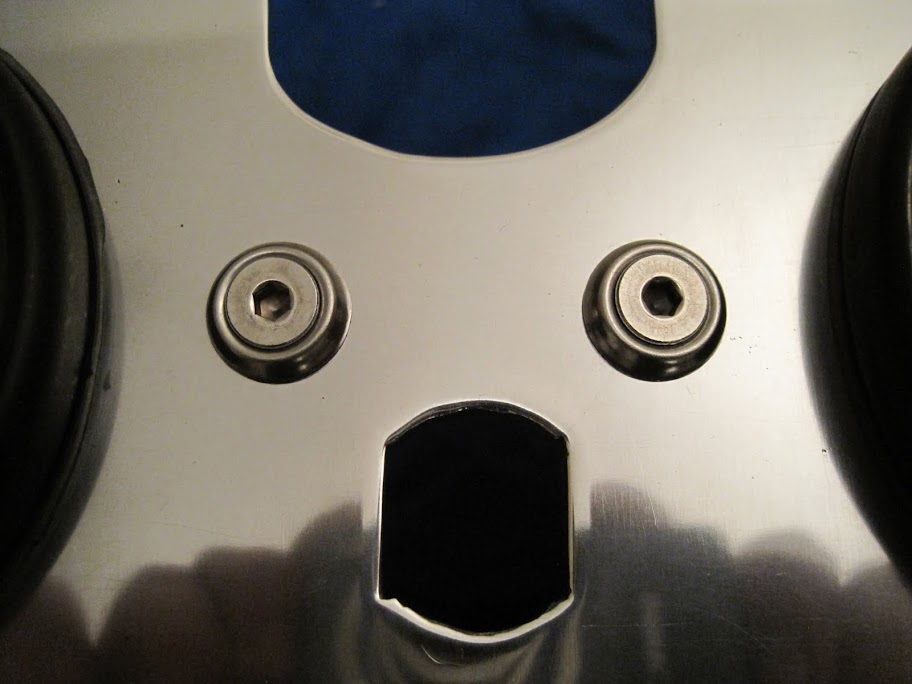
Installed the dash, gauges and controls tonight. Had to modify the Rupp gauge mounts to mount them. They weren't designed for this type of mounting apparently. The U shaped holders wanted to flare out. The Scorpions had a lip on their rings, so I added a lip. Pretty simple change, but like everything else with a custom, nothing is bolt together. 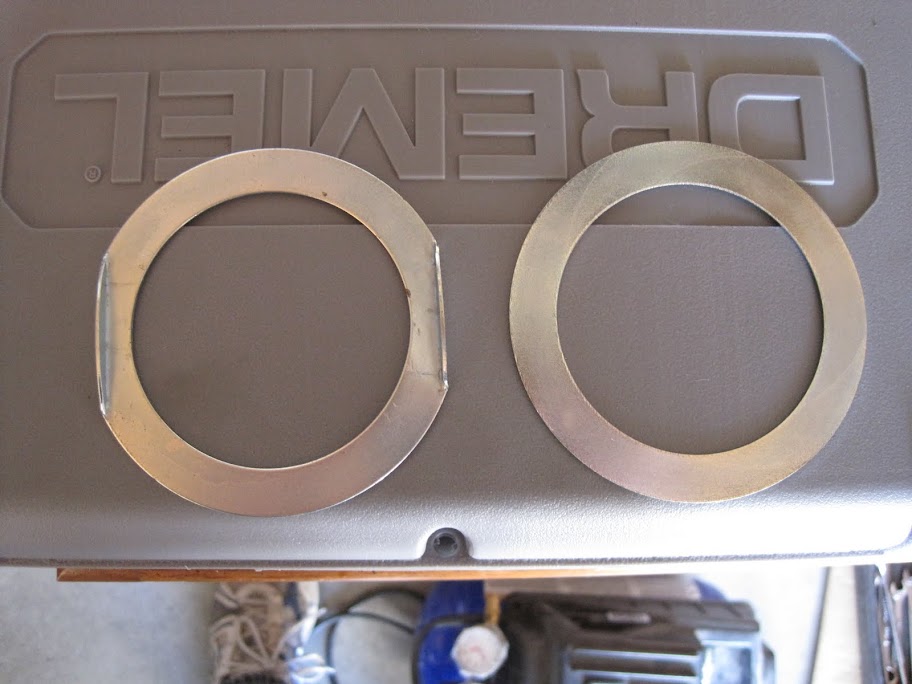  The flash doesn't do it justice, but it looks pretty good on the sled. I'm using TK / Sting handlebar controls. I test mounted some grips that were too big, I have to figure out how to cut them cleanly, but I know the length I want now. 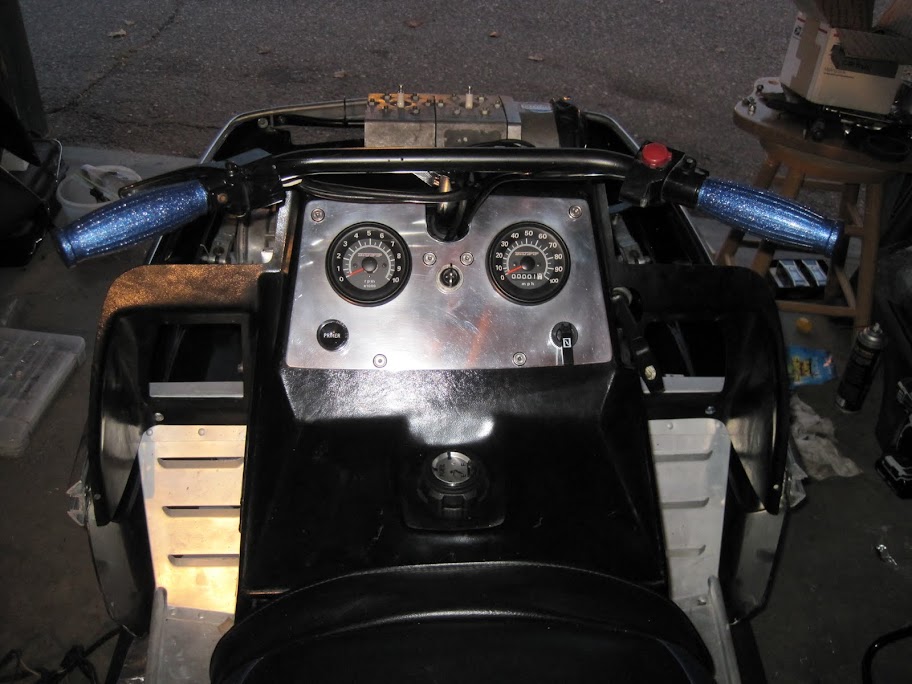 I had this pad laying around and it is about the right length. I put it on and it looks pretty good. I have to cut out for the T part of the bar yet and then it will lay flat. 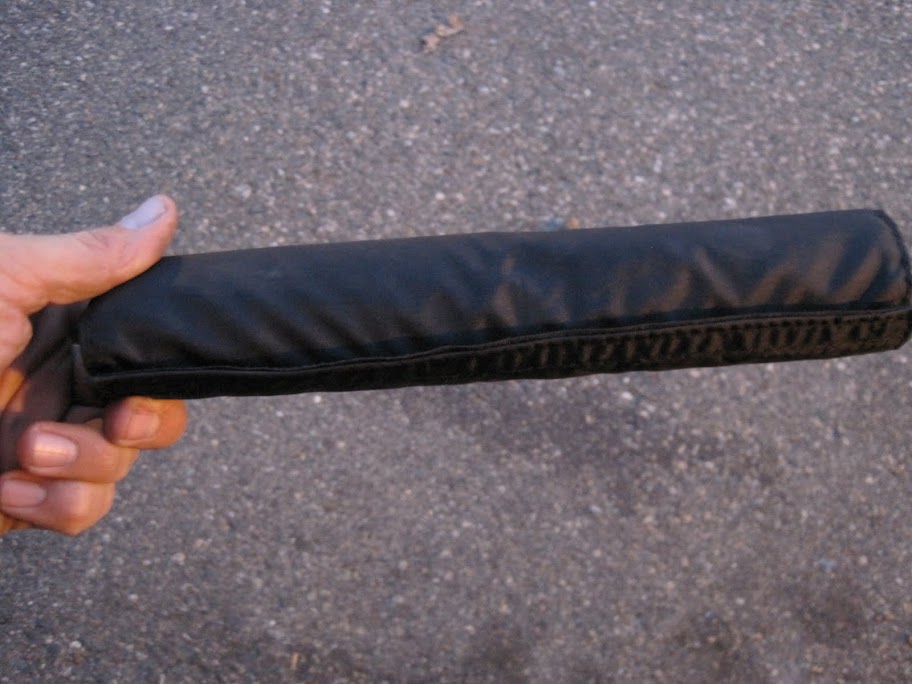 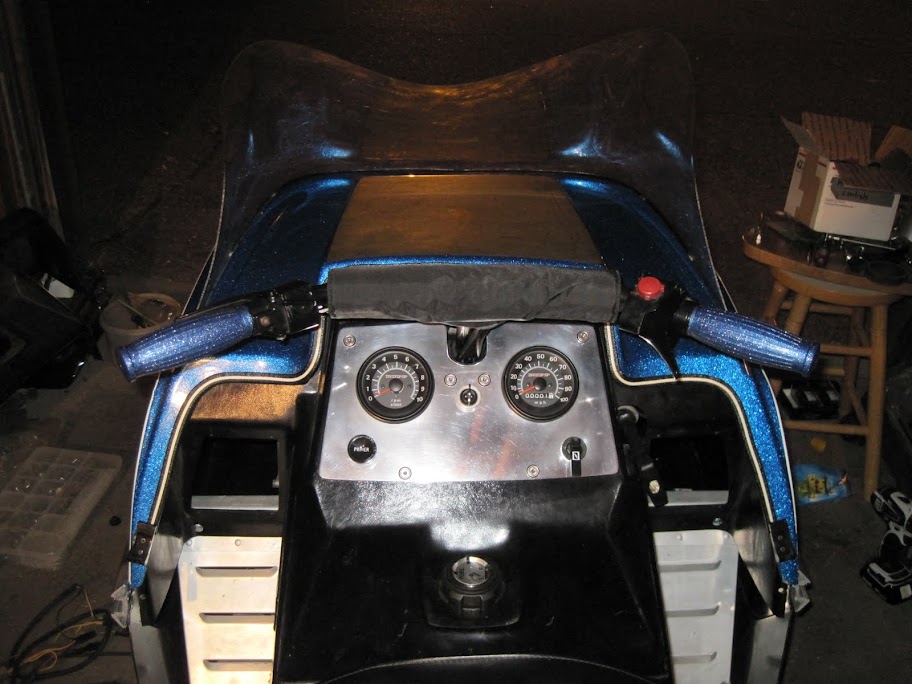 The windshield needs some work yet. I plan to shorten it (not sure how I am going to do that straightly, but I also need to get the bow out of it. Gonna prop it up and try some heat after cutting it and see what that does. There is some protective paper film over the black decal that is under the windshield. It won't come off. Not sure what I am going to do. If I could get the whole decal off, I'd just remove the whole thing. But it doesn't want to come off either. And it is a BIG decal to pick it off in tiny pieces. Set the hood on. I still have some adjusting to do to get the hood to fit and sit down like I'd like. It is starting to look like a snowmobile now. 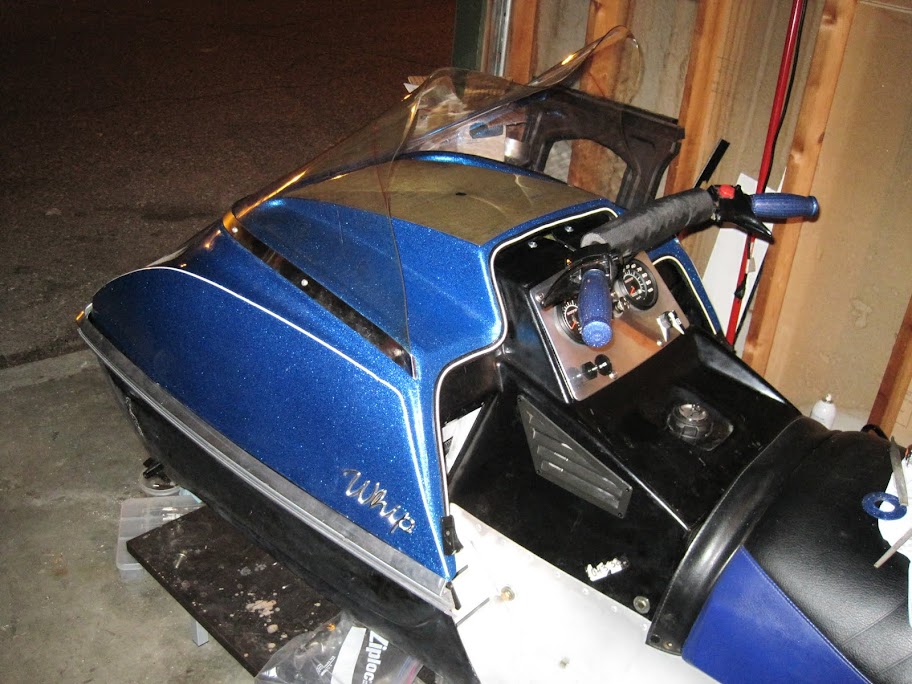 |
|
|
|
Post by scorp11 on Oct 19, 2012 21:11:29 GMT -5
Thanks !! Kinda nice to get to some cosmetic work for a change !! |
|
|
|
Post by scorp11 on Oct 25, 2012 0:28:43 GMT -5
Did some work on small items, figured they should get posted too. The pre-1980 Scorps had a vent hole in one of the bolts that hold the secondary in place. Basically it let let the chaincase vent right on the brake. These things had a poor enough brake without putting oil on it. In 1980 they put a roll pin and hose on it. The way to do it on an existing one is like this. Drill the vent hole big enough for a small roll pin. You don't need to drill all the way, just enough to get the pin in securely. Take some 1/8 inch fuel line hose and route it down below the chaincase. Remove the top to rear bolts and put ones in that are long enough to thread through the back and put wire holders on them with a lock nut. 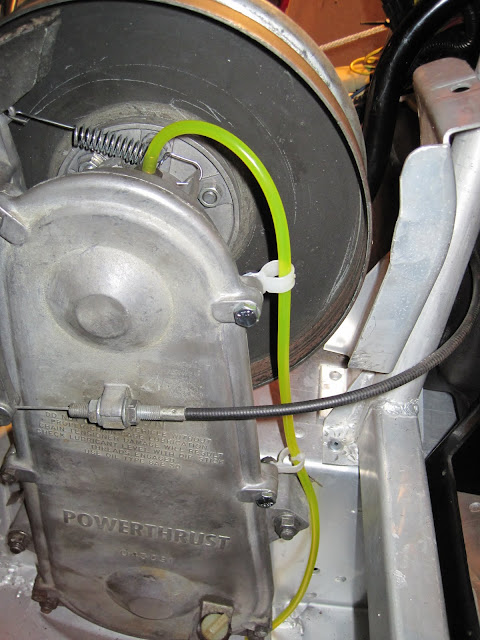  You could put them on the front if you had metal clips that will allow you to tighten up the cover. I originally had this, but it doesn't let you tighten the cover up like it needs to be. 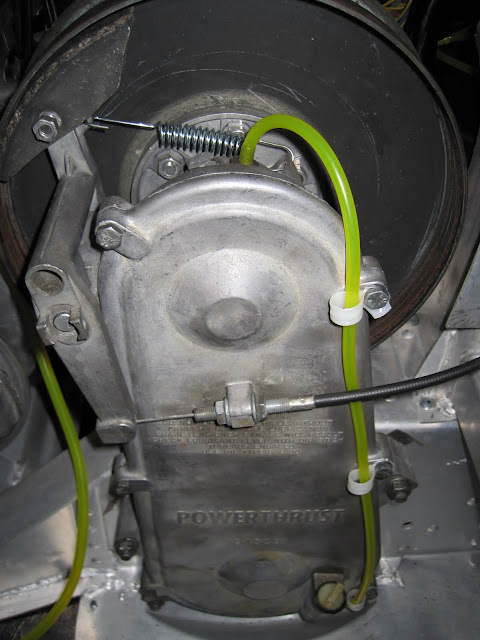 |
|
|
|
Post by scorp11 on Oct 25, 2012 0:59:07 GMT -5
Most of the wiring is done. I had to build a custom connector to make the Rupp tach match the Scorpion harness. If I had an existing tach out of a 1979 and up Scorp, I coulda stole the harness I needed from that, but the only one I had was NOS and I didn't want to do that. For whatever reason when I put the new stator on this motor originally, I didn't shorten the wires, but wired it full length. That left a lot of wire left. Not an issue, but made it look a little more cluttered when I tie wrapped things together.  Added one tensioner to the chain. Two wouldn't fit and the later sleds used one anyway. 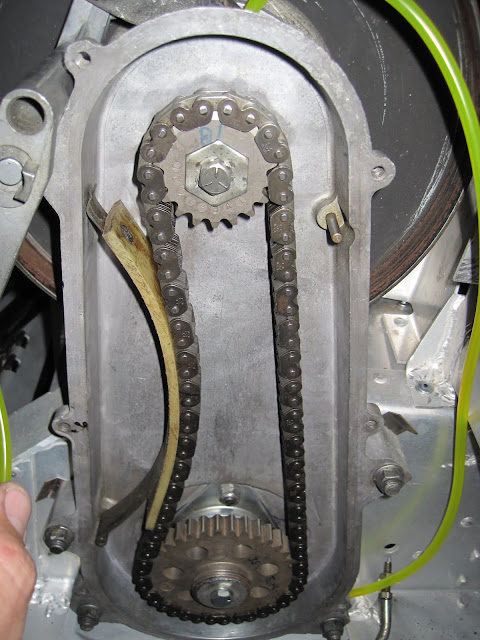 |
|
|
|
Post by scorp11 on Oct 25, 2012 1:14:40 GMT -5
I learned all Mikuni VM carbs are not the same. I was planning on switching to a 38mm carb I had from the 36 mm power jet. Once I put it on the intake, it was over 1/2 inch too short for the airbox. Below is the difference. I think the 38mm I had is a very old carb, but it was an educational experience.  To get a airbox to work, I had to make my own rubber boot for it. I don't have any good ones left, nor do I have a source for them. I spaced the airbox so it would be centered better over the carb and decided to try and build my own boot out of hose. Took a little experimenting, But what I came up with was below. I had to use a whip airbox as the carb opening is a little smaller. Took three different layers to get a tight fit. First some windshield trim with glue inside.  Next some 1/4 tygon fuel line. Was going to glue it, but it seemed to stayed in place without it.  Finally some 5/16 rubber fuel line.   I think this should work good. I guess I'll find out once it is all together. The fit around the carb is good. I still want to find a 38mm Mikuni carb, but the airbox is ready for it |
|
|
|
Post by scorp11 on Oct 26, 2012 21:43:56 GMT -5
Well, if there is one thing I have learned on this project, it is that nothing ever just fits. I am using a variation of a Sting / Whip Airbox / Airbox mounting on this sled. Well, I got all of that trial fit and it dawned on me that I should try the hood with that all there to make sure the 75 whip hood fit over it all. It didn't. The airbox top was too high and wouldn't let the hood close. Of course the first reaction is crap, now what am I gonna do. I planned this whole sled around the hood. Talk about a show stopper. After my first panic, once again, I started looking at my options. After looking at the carb airbox and silencer a little closer, it looked like I could gain well over 1/2 inch there (should be more at the back of the hood). Note the tall lip on the airbox and the step on the silencer.   I cut the step off the silencer and the lip off the airbox 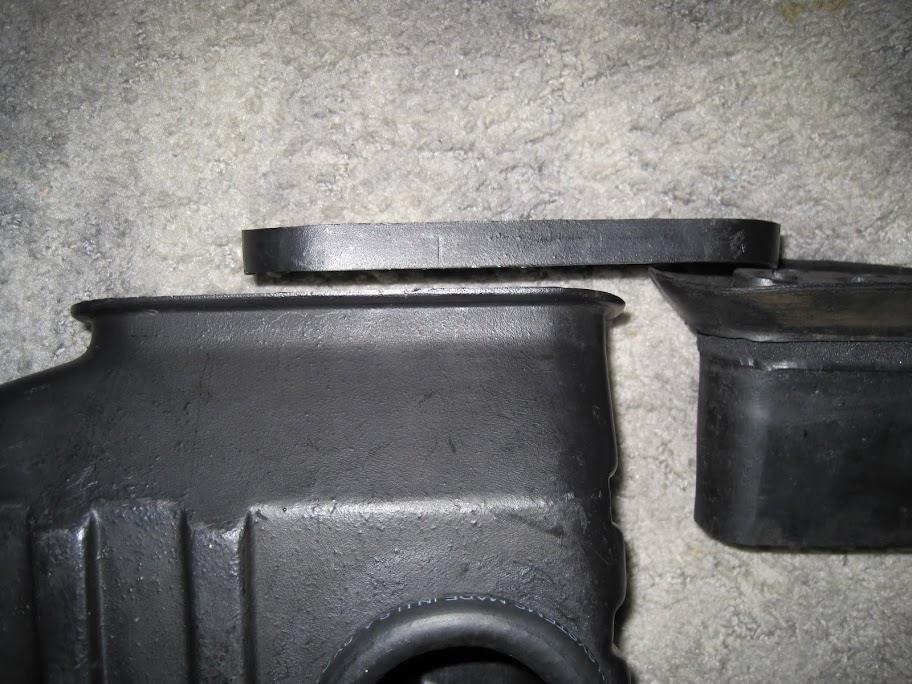 Then I cut two rings off the hose that goes to the fan airbox to match what I took off the airbox 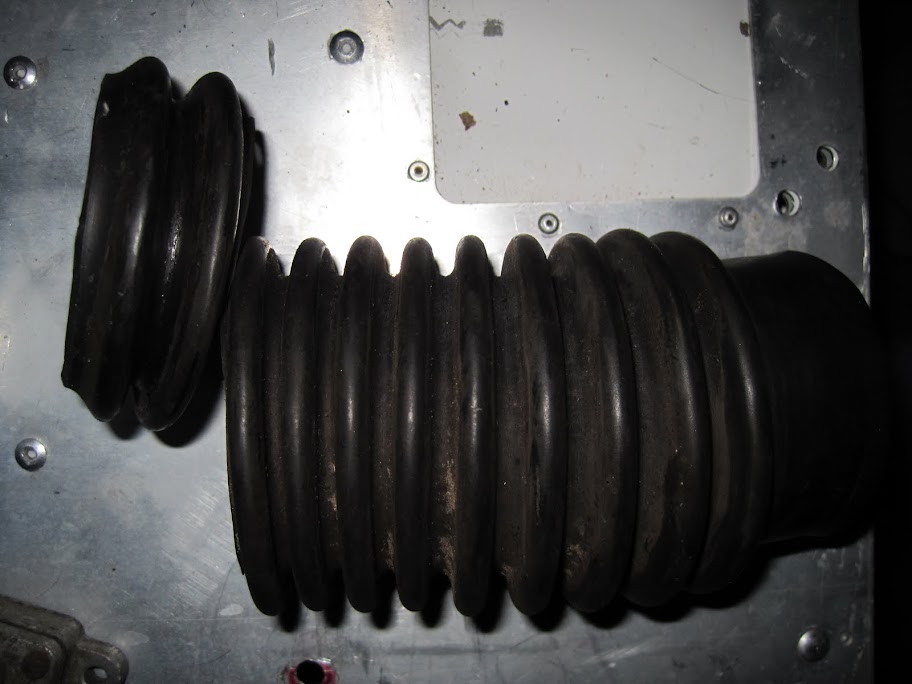 I didn't install everything, but did install the carb airbox and the top that goes on it and the hood fit again. Whew, I think I dodged a bullet. I was worried that this whole project was not going to be able to have the pretty blue hood. |
|
|
|
Post by scorp11 on Nov 7, 2012 22:06:58 GMT -5
Mostly right now I am waiting on parts. But I did get a few things and made a little progress. Got my pipe wrap, interesting stuff. This was a little more expensive, $45 for 50 feet of 2 inch wrap. But, it is higher temp and most importantly to me, you install it dry. I didn't need all of it, but I didn't want to run out. Not the quickest thing to do, but other than trying to get it tight over the major bend in the pipe, it isn't too bad. It has a "sheen" to it when installed. I assume that will go away after it gets cooked a couple times. Looks kinda cool now though.  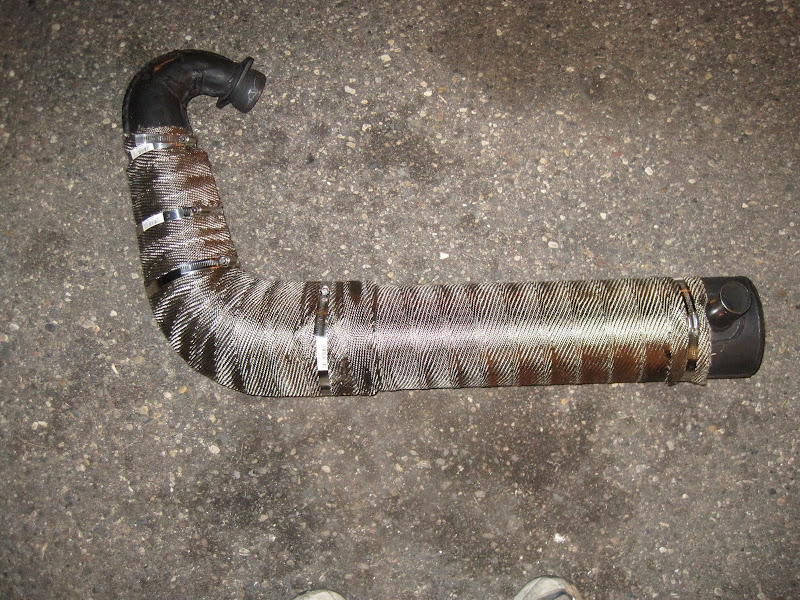   Hopefully this keeps the temp down under the hood. Once I get the front mount for the pipe, I'll get it in the sled. One of the hose clamps is right above the steering and the excess might be in the way. I think once the front strap is there, it won't be an issue, but if it is, I'll trim it. I may have to move the hose clamp anyway as it might be where the exhaust mount goes. Before I got to install the wrap, I did run into one problem. Dad had already welded up this pipe and painted it. Inside was this nice mouse nest. Fortunately I think I was able to get it all out of the pipe. If I didn't know what the pipe looked like inside, I'd still be concerned, but since I do, I am pretty sure I got it all. This is about 1/2 of what I got out of it. This was one busy darn mouse !!  |
|
|
|
Post by scorp11 on Nov 7, 2012 22:07:35 GMT -5
I finally got the decal off the top of the hood. I gave up on getting the protective paper off it as that stuff didn't want to come off. It took a heat gun and time. just keep peeling parts of the decal off while heating it. You can see the metalflake in the fiberglass isn't as good up there. Maybe that is why the put the decal on these in the first place, or maybe they knew they were putting one there so didn't worry about coverage. If I were going to get the windshield painted, it would be a non-issue. Not sure I'll get that done. decal on. 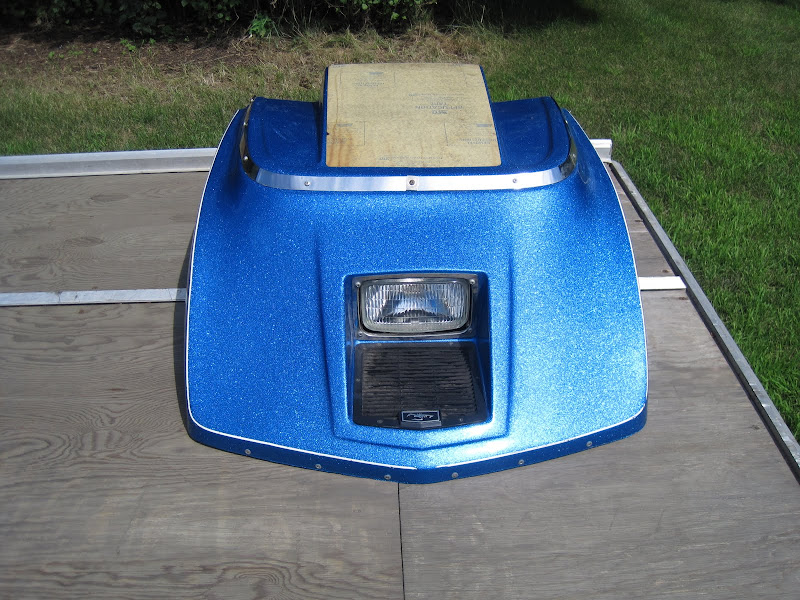 decal off  |
|
|
|
Post by scorp11 on Nov 9, 2012 0:32:07 GMT -5
Didn't get much done today, but did learn the aluminum clutch guard I planned to use didn't fit as well as the best steel one I had around. So, no shiny polished clutch guard on this sled, just a plain boring black one. I'll save the light aluminum one for a future "lightweight" project I have in mind.  |
|
|
|
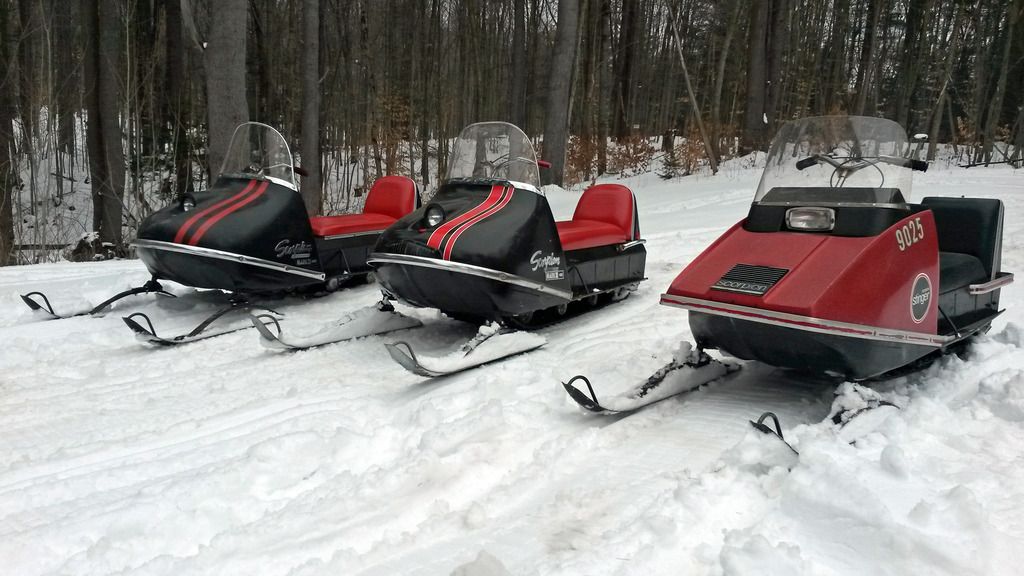
Post by scorp11 on Nov 10, 2012 22:26:44 GMT -5
Had to do some re-organizing today, so the sled got outside. I had to put the ski's on to move it. The ski's were an NOS pair I had and didn't have to be painted. I painted the springs silver and and the shocks are painted black when I get to putting them on. I wanted something to break up the all black of the ski's, that is why I chose to paint them silver.   Kind of a dreary day, but I couldn't resist taking a few pics of it since it was outside.  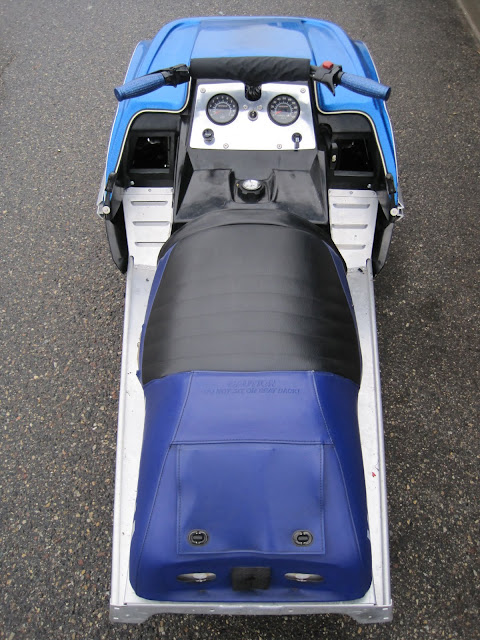  I cut down a tall windshield. I am having some issues trying to get it to retain the shape it needs. This one was pretty distorted, that's why I chose to cut it first. I tried bending a lip on the top and that helped a little, but not enough. I've heated it and am letting it stay propped like this for a while. 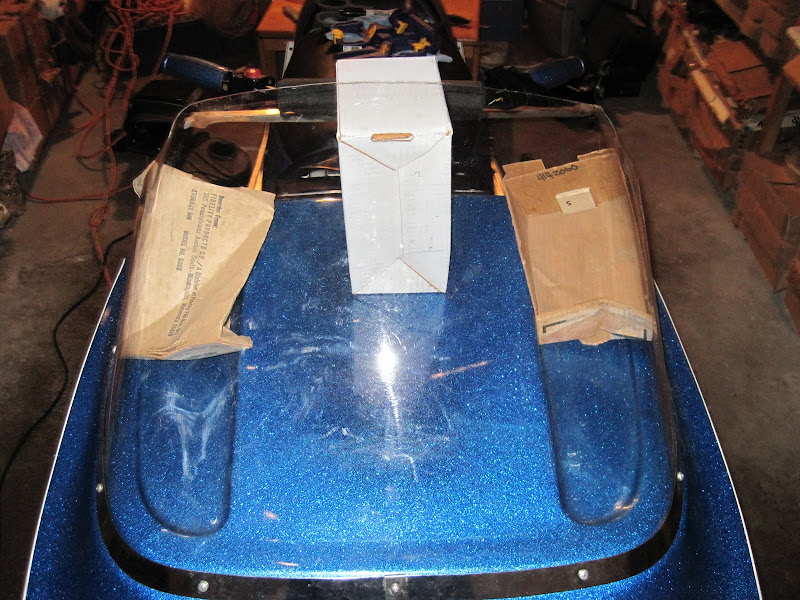 If it doesn't hold shape with the trim on, I may take it off and try to put a crease down the middle. I don't know how I will do that cleanly, but it is all I can think to get it to hold its form. |
|
|
|
Post by scorp11 on Nov 13, 2012 22:30:09 GMT -5
After some tweaking, the windshield turned out ok. Not perfect, but that's ok, this sled isn't meant to be perfect. I think it will hold its shape ok. Whatever these are made from are pretty easy to form with a heat gun. 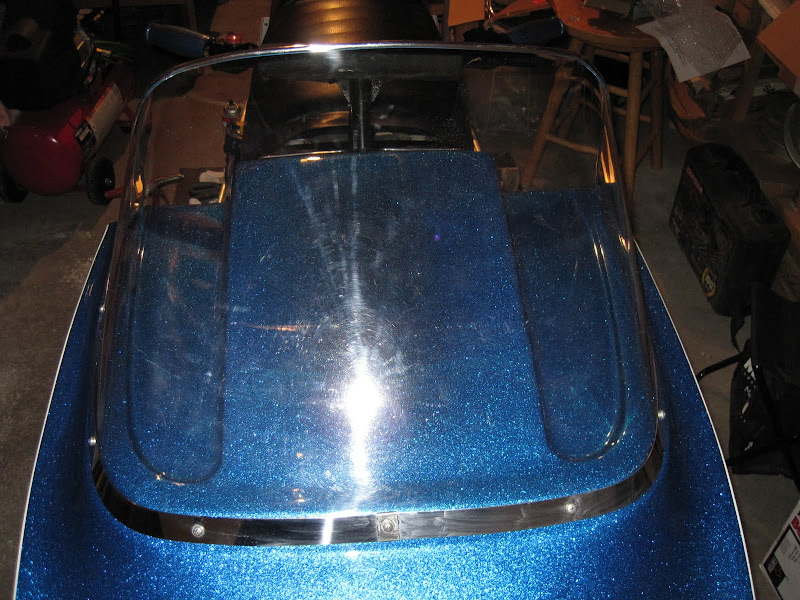 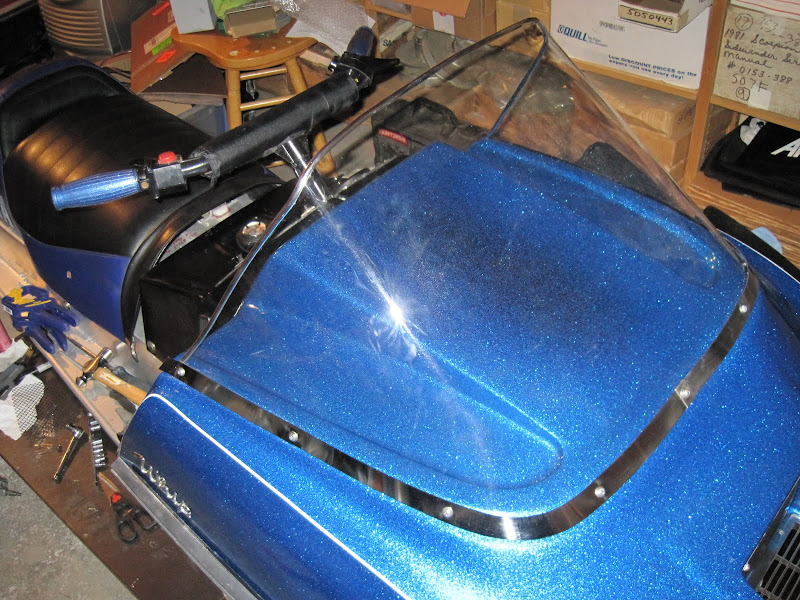 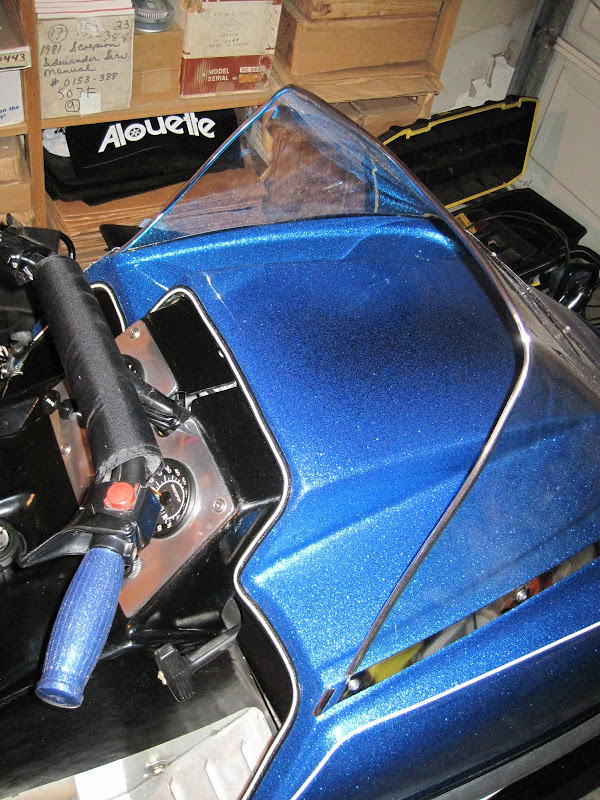 I have decided to leave it clear. With the decal off underneath, I think it looks a little more classy being clear with the chrome trim. |
|
|
|
Post by scorp11 on Nov 13, 2012 22:31:14 GMT -5
I didn't get the parts I needed for the under hood stuff, but the stuff I ordered to use for the vents did show up. I ordered two different styles. The one with the bigger openings is made from stainless, the hex one is made from aluminum. I like the look of the hex, so I chose to go with that one. Plus, being aluminum it was very easy to trim with just a snips.   I had some black rivets to use, so you wouldn't have seen the rivets, but I kinda like seeing some of the fasteners on this sled. So I used some stainless ones I had. Aluminum and stainless, neither should ever rust !!    I like it. The side I put out is actually very shinny, but that doesn't show up in the pics. Once I got it riveted in place, it is pretty sturdy too. As long as I don't let the recoil handle fly, it should stay looking nice. Cost wasn't too bad either. I have enough of the stuff to do 5 vents with the honeycomb type and enough to do 4 of the larger stainless type. It cost me around $30 for that. So, the amount I used in this sled cost less than $10. Much cheaper than a set of the stock vents and quite honestly, I think it looks much better, especially with the dash panel. It did make the hood / dash fit a little different once it was all riveted together. It stiffened things up, so the dash couldn't flex when the hood was closed. |
|
|
|
Post by scorp11 on Nov 28, 2012 1:07:00 GMT -5
Got some parts today. Still missing the first ones I need, but I did a little. I bought a brand new 38mm Mikuni carb. Reason is, everyone seemed to want pretty much new price for every single used one I looked at. Now everything is nice and clean, just have to sort out jetting.  So, of course, what do you do with a brand new carb ? You tear it apart, right ? I wanted to verify the specs. This was a VM 38/21 carb. Since the float pin didn't want to come out and I didn't want to break it, I'll trust that one is per spec. The rest I verified  Based on what I can tell, I think this might be close, but I am going to post it in the tech area and see if anyone sees things that should change Slide Cutout : 2.5 Needle : 6DH3 - Clip in Middle groove Needle Jet : 166 Q0 Main Jet : 360 Pilot Jet : 40 Float is level Needle and seat should be 1.5 |
|
|
|
Post by scorp11 on Nov 28, 2012 1:07:39 GMT -5
Well, I ran into a bit of a show stopper today. I think I have a work around, but first what went well. In order to put the wavy washers under the steering arms, I had to take the ski's off. One thing I did with these I forgot to post was to make my own pins for the rear spring perch. I couldn't find any pins the right length, so I cut off a grade 5 bolt right whe(4 inch I think)re the threads started, it was just the right length. Then I drilled a hole in it and put a little paint on the part I cut.  I got the steering installed with the washers and tackled installing the carb and airbox. It all fit pretty well. You can see the modification I made to the bracket here.  Carb fit decent too as did all the cables after I switched the choke cable. I needed a longer one than I had originally, so I used one that fit a TK.  I only have one latch left that holds the top on the airbox. So, I bought some 9 gauge wire and took to making one. I have enough wire to make a LOT of them. Since I cut this airbox down earlier, I also had to re-drill new holes. turned out pretty good and seems to work. I checked and the hood fit afterwards too.    I installed the clutch guard. Took a little fitting, but it fits good now.  |
|
|
|
Post by scorp11 on Nov 28, 2012 1:08:06 GMT -5
Now for the "show stopper". It was time to put the exhaust in place. Initially I planned to put the spring and "washer" setup in place Scorpion ran on the mid 70's whips.   In the end I with the way the exhaust mounts on this, this is kinda useless, so I left it out. I did notice that muffler exit might move enough hit the tunnel in one spot when bounced around. It wouldn't hurt anything, but I put some trim around that so it didn't do a bunch of clunking. Hopefully it isn't that hot there, so it won't melt the trim I put there. I'll find out I guess. 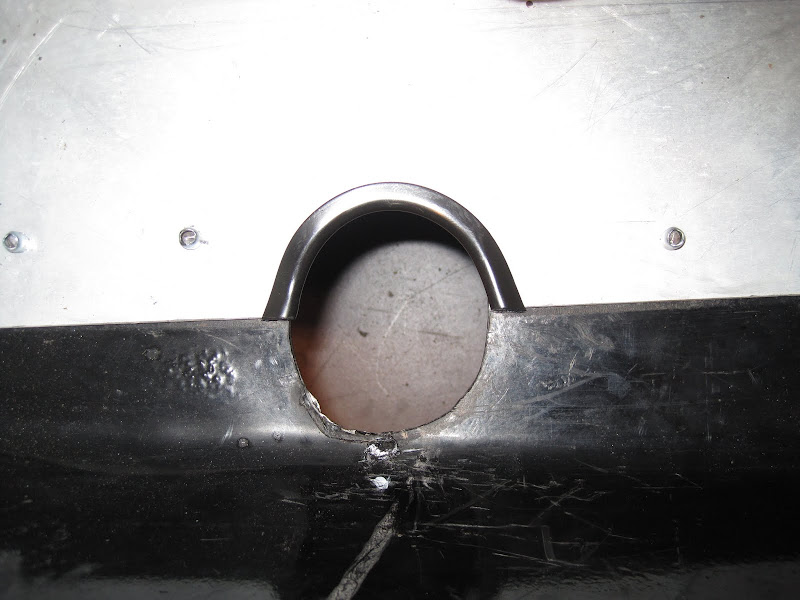 Soooo. . . Everything looked good, so I put some high temp silicone in the joint between the pipe and the manifold. This helps it not puke oil out all over when it is started the first time. Then I put the pipe in.  This is the spring that should hold the front part of the pipe down and in place. The hood couldn't even come close to closing with that in place. 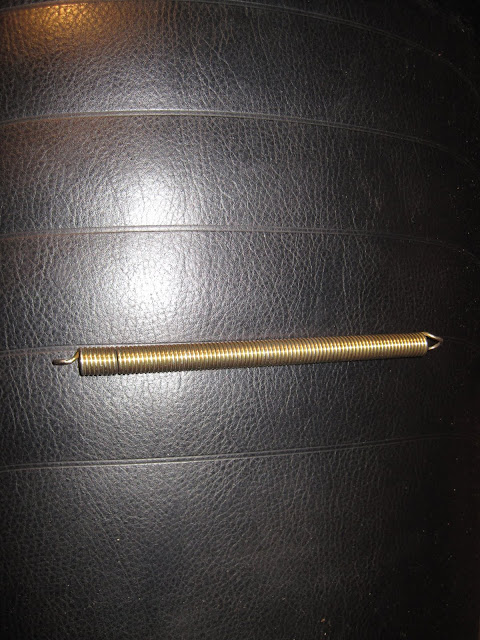 So, I took it off and tried to close the hood. It hit the lip that is on the pipe. WTF ?? I had trial fit this thing before and everything fit OK. Turns out when I trial fit it, one major item was missing. This piece that holds up the front of the pipe.  Never dawned on me that that was going to make a difference. Well it raises the pipe above the belly pan trough right where the hood comes down. To make matters worse, when I fastened it to the bumper, I had to drill the hole for it in the bumper. I cheated it as high as possible to make sure I had plenty of room between the steering arm and this bracket. You can see when I trial fit it how close it actually was, but at that time it was lower and didn't actually interfere with the hood. In the past, this would certainly have lead to a profanity laced tirade. But after this sled, I simply looked at it and thought "I better get the hammer". So, I got the hammer. I took the pipe and pounded down the lip that is on the pipe in that area. This of course shredded my nice fancy wrap that is on the pipe. Next I got the wrap I had left and put another layer over the top of this whole area. Now I have two layers in the area closest to the hood albeit the bottom layer being cut in two at the lip. I put it back in and I had more room, but the hood still touched it slightly. 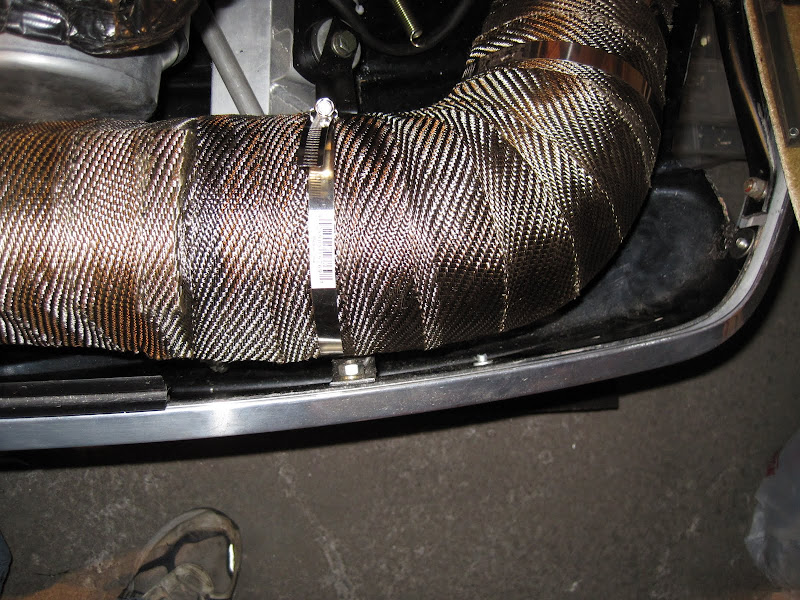 So, it was getting late, but I did come up with a plan to address it. This is the side of the hood that doesn't fit perfect anyway. I haven't been happy about it, but I could have lived with it. I cut off an extra piece of hood guide off another and I am going to extend the current hood guide.   That will also have the benefit of putting the plastic guide between the pipe and the hood. It should melt the guide before the hood. I am also going to drill out all the rivets on the current guide on this side and raise it up. You will be able to see it above the bumper a little after I do that, but the hood should fit better. I hope anyway. . . Plus, that is how most of them were installed anyway, I just lowered this a little when I installed it as I had to drill new holes and didn't want to see the hood guide. I'll find out tomorrow I hope. . . . I'll also have to hope that pounding the lip down won't now leak. I don't "think" it will, but I wasn't going to completely unwrap the pipe to find out. If it does, I am sure I will find out pretty quickly once I run it. |
|


 ?
?